Metadata Configurator Tutorial#
Introduction#
These tutorials walks through creating a metadata template using the Metadata Configurator and then validating this template. Metadata of the following Investigation was used as an example Parbie PK et al., 2021. In this study they analyzed the dysbiosis of the fecal microbiome in HIV-1 infected individuals in Ghana.
The metadata workflow in FAIR Data Station consists of three main steps:
Create a metadata template (Metadata Configurator)
Fill in the metadata (Excel template)
Validate the metadata (Validation tool)
Step 1 |
Step 2 |
Step 3 |
|---|---|---|
Create an ISA metadata Excel template |
Recording of your metadata |
Validation of registered Field/Value pairs |
|
|
|


After these steps, you can achieve data FAIRification by generating a machine-actionable metadata resource.
Metadata Configurator#
The Metadata Configurator itself consists of three sub-steps:
Selection of appropriate project specific metadata standards
Selection of appropriate experimental metadata standards
Generation of metadata template
After these, your metadata can be recorded in the spreadsheet template and the content can be validated against template requirements.
Step 1. Selecting project metadata standards#
We will define the aim of the study, the approach, and sample specific metadata.
Start up the FAIR Data Station tool available at https://fairds.fairbydesign.nl (or run your own instance) and click on Metadata Configurator
Investigation#
The Identifier, Title and the Description of this Investigation would be something like: (you can copy/paste the various items in the Investigation textbox of the FAIR-DS tool).
Identifier: demo1
Title: Dysbiotic Fecal Microbiome in HIV-1 Infected Individuals in Ghana
Description: The aim is to investigate the composition of the gut microbiome in HIV-1 infected individuals undergoing antiretroviral therapy in Ghana, West Africa. Despite effective control of viral replication, these individuals often experience non-AIDS-related diseases like cardiovascular and metabolic disorders.
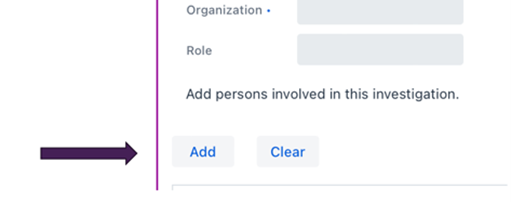
Note: Make sure that when you add (your) name and e-mail you click the add button.
Package selection (Investigation)#
At each level, the metadata can vary depending on the packages selected. At the investigation level click on ‘Select a package’. You will notice several minimal models present in the dropdown menu, in this example we will use default model called minimal.
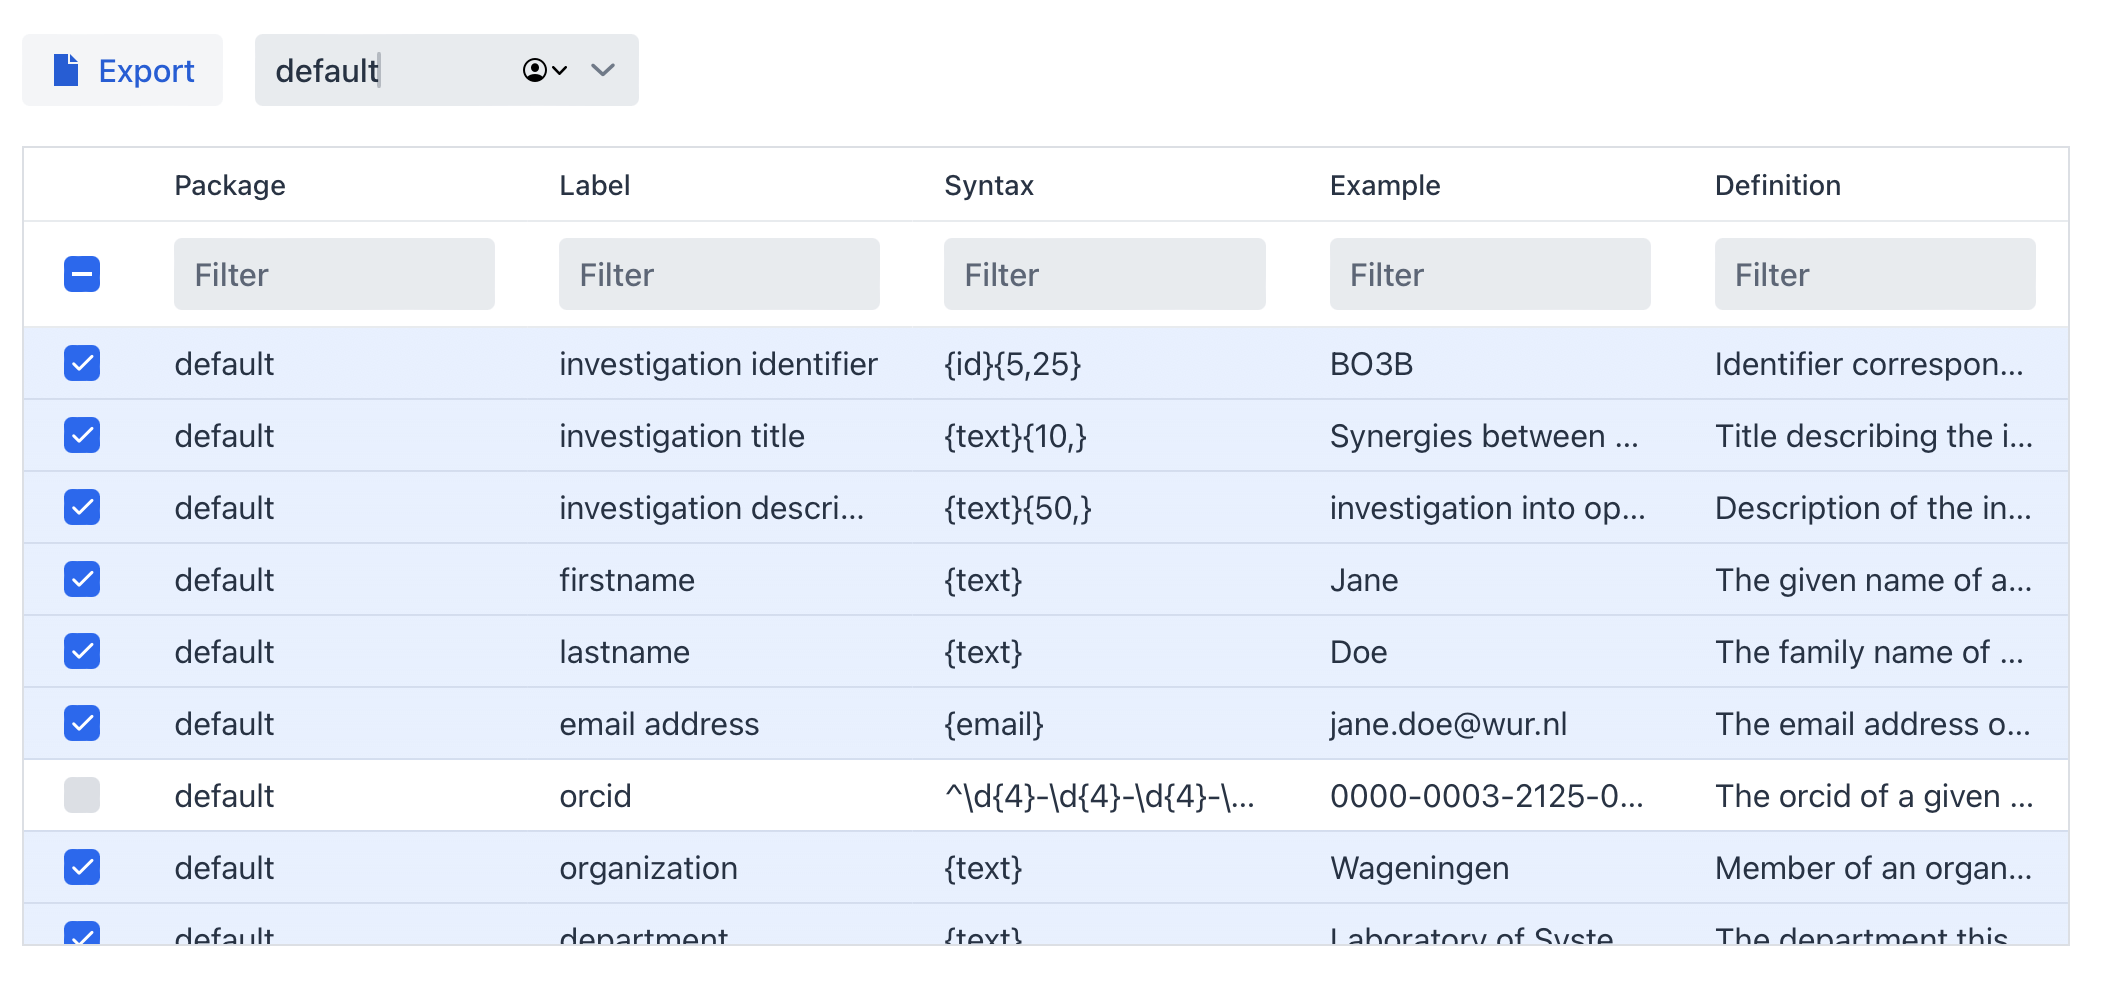
Within a package not all terms have to be selected (by default only mandatory and recommended terms are selected). Terms from other packages are available to be selected in case you want to mix and match different packages together and re-use terms.
Once this is done, move on to the next section.
Study#
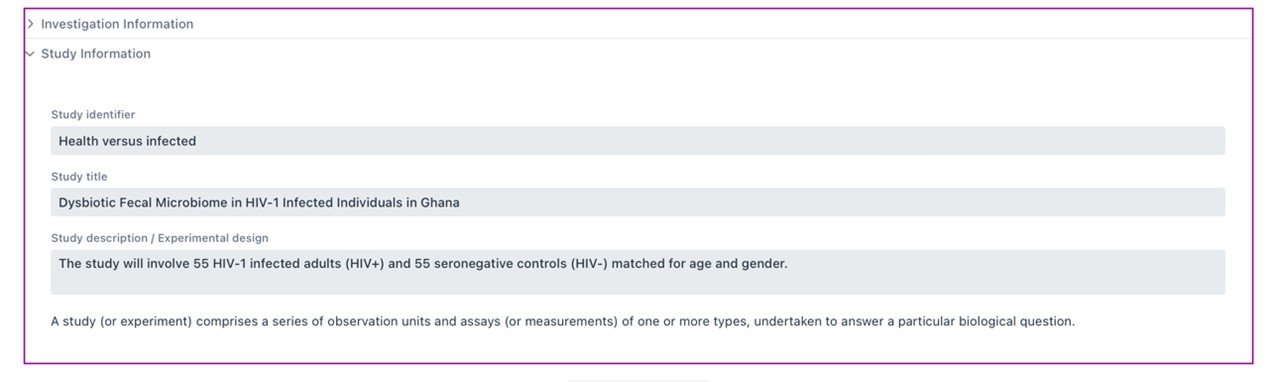
Unfold the Study Information textbox at the bottom left of the Step 1 textbox.
In this example there is one Study – but you can imagine that there will be a follow-up study at a later stage. Here we add the specifics of the particular study. In this case:
Identifier: control_vs_infected
Title: Comparison of the Fecal Microbiome of HIV-1 Infected Individuals in Ghana with seronegative controls.
Description: The study will involve 55 HIV-1 infected adults (HIV+) and 55 seronegative controls (HIV-) matched for age and gender.
Again, you can copy and paste the text here into the corresponding textboxes. That already concludes the first step out of three!
Package selection (Study)#
As is done for the investigation, a package needs to be selected for the study as well. We will again select minimal in the dropdown menu.
You could now already click the Generate workbook button. This will export the Investigation and Study information into an Excel file. As is mentioned, the Observation Unit, Sample and Assay could be integrated at a later stage. In this tutorial we will move on to the second step using the same opened webpage.
Step 2: Selecting experimental metadata standards#
Observation Unit#
Note
In this example, samples are taken from paired individuals, 55 (HIV-1 pos) + 55(HIV-1 neg). We could opt to define them as 110 individual observation units. This would make sense if for instance a time series experiment involving multiple samples per individual is performed.
Alternatively, we can collapse the individuals into two groups, “HIV-1 infected” and “seronegative controls”. With respect to the metadata there are consequences. If we define 110 separate observation units the “date of birth” becomes a fixed attribute directly linked to individuals /observation unit. If we collapse the individuals into two groups, “Host age” becomes a variable which should be directly linked to the sample taken.
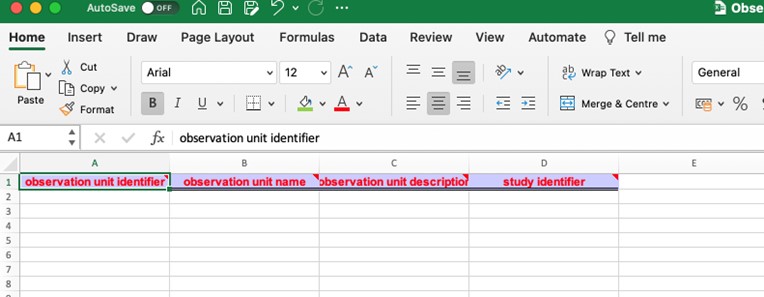
Unfold the Observation Unit Information textbox under the Experimental metadata section. Click the drop-down menu select a package and select the minimal package. If you click the Generate workbook button now it will export a new Excel file containing the Investigation, Study and Observation Unit.
Note
If you click the Export button inside the Observation Unit, the program will then export only the observation unit sheet of the complete workbook which can be a handy feature when we may want to amend our experimental design with more groups. In this tutorial however, we will create a complete workbook.
When exporting our data into the Excel format, column headers represent interoperable Field names or attributes selected within the configurator.
Sample#
Next, unfold Sample Information at the bottom left of the textbox.
The FAIR Data Station currently has 40+ minimal information models (packages) to choose from. In our example, the most appropriate is the “human gut” package which you select under the select a package drop-down menu. Mandatory and Recommended Fields are selected by default, other Optional Fields can be selected to further enrich the metadata and we strongly recommend to do so when such information is available.
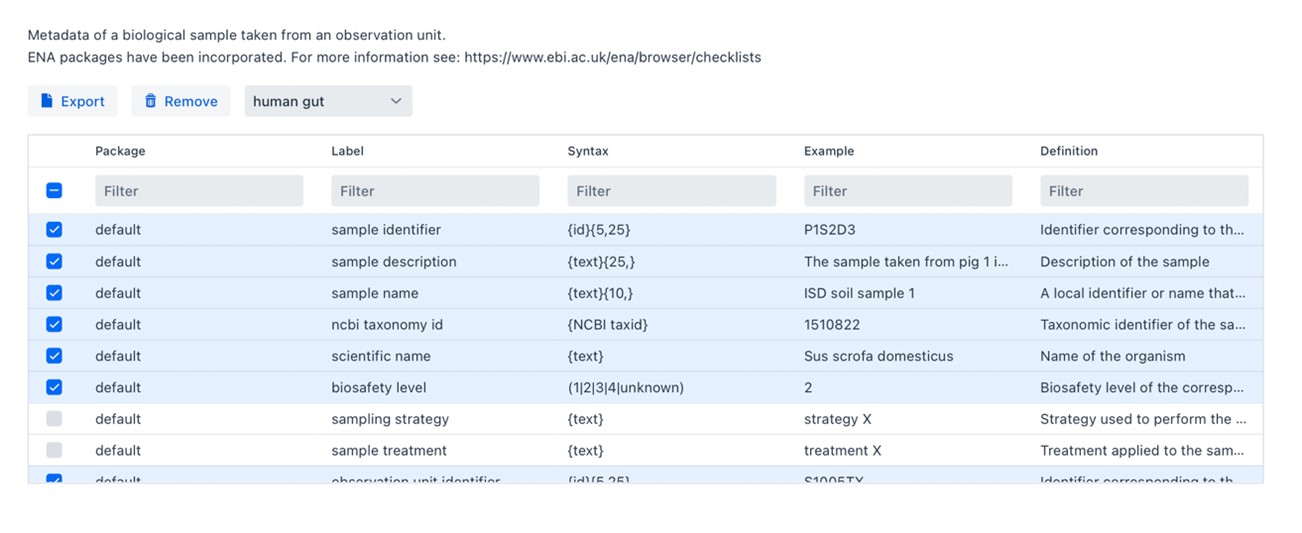
Let’s go back to the metadata per sample available from the original study. (ENA Accession: SAMD00244418)
Sample metadata
Attribute/Field_Name |
Value |
|---|---|
Organism |
human gut metagenome |
Sample Accession |
SAMD00244418 |
Sample Title |
16s rDNA sequence from fecal sample of non-HIV-1 infected male from Koforidua, Ghana, sample ID HG-P-001-KO-A |
Center Name |
AIDS Research Center, National Institute of Infectious Diseases |
Sample Alias |
SAMD00244418 |
Broker Name |
DDBJ |
ART Status At Baseline |
Control |
Secondary Accession |
DRS176859 |
Education |
Primary school |
Occupation |
Trader |
Collection Date |
23/03/2018 |
Sample Name |
001A |
Env Broad Scale |
human gut |
Host Disease Stat |
HIV-1 negative |
Sex |
male |
Geo Loc Name |
Ghana:Koforidua |
Marital Status |
Married |
ART Drugs Current |
Control |
Env Local Scale |
human gut environment |
HIV Risk Exposure |
Heterosexual |
Project Name |
Dysbiotic fecal microbiome in HIV-1 infected individuals in Ghana |
Host |
Homo sapiens |
Env Medium |
fecal material |
Age |
50 |
Bio Sample Model |
MIMARKS.survey.human-gut |
ENA-FIRST-PUBLIC |
26/03/2021 |
ENA-LAST-UPDATE |
05/11/2023 |
A number of these Fields represent sample specific metadata that we should be recorded during sampling. Although the terms are understandable for humans, they have interoperability issues. For instance, if we zoom in on the block below, we know that the correct “interoperable” terminology is different.
Field |
Value |
Interoperability issue (ontology) |
|---|---|---|
Host |
Homo sapiens |
“ncbi taxonomy id” (9606) |
Env Medium |
fecal material |
“environmental medium” |
Age |
50 |
Host age |
The selected minimal information model on the other hand does contain the correct Field names and the restrictions on the linked values. These restrictions are also directly available in the resultant Excel workbook by hovering over the column headers.
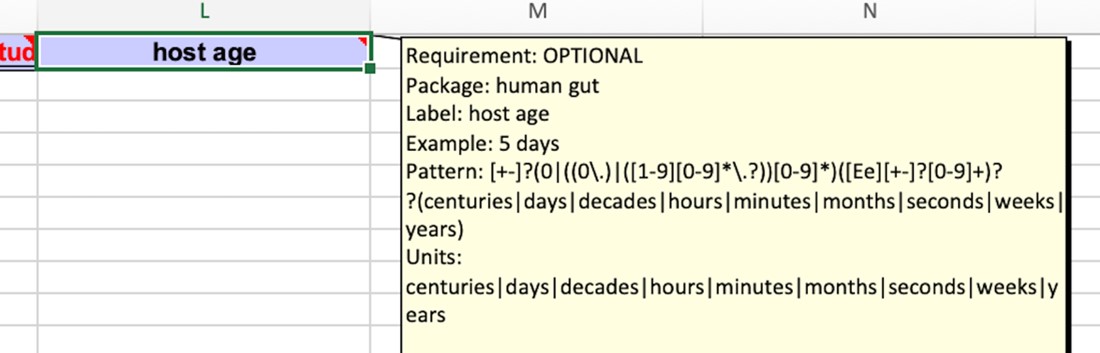
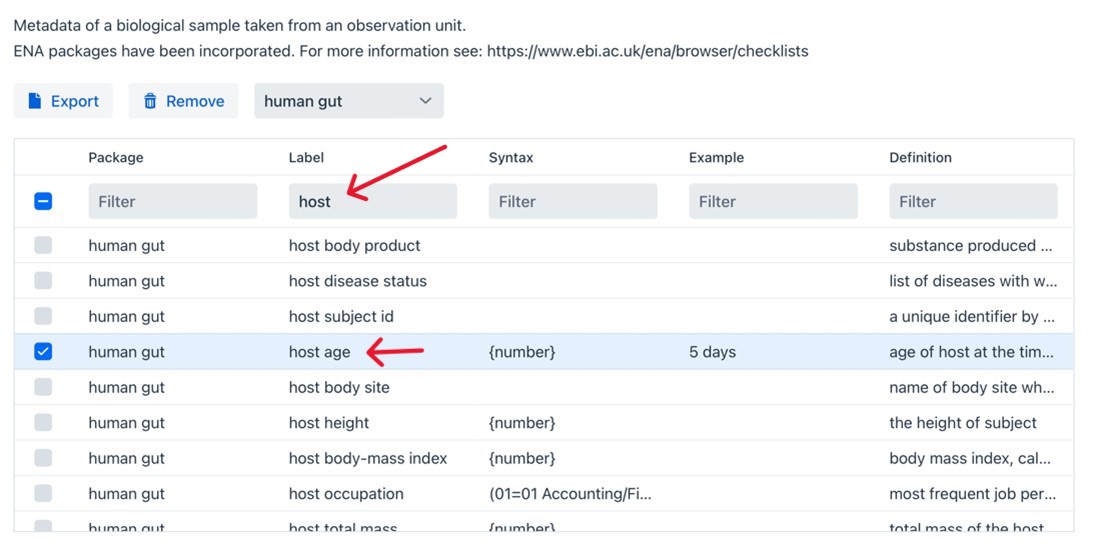
To increase the interoperability of your metadata you have the option to either systematically review this list, which incidentally helps you identify crucial metadata you might not have considered and could enhance your design, or filter specifically for terms related to in this case “host”. To do so, type in host into the top Label box, then select host age.
Assay#
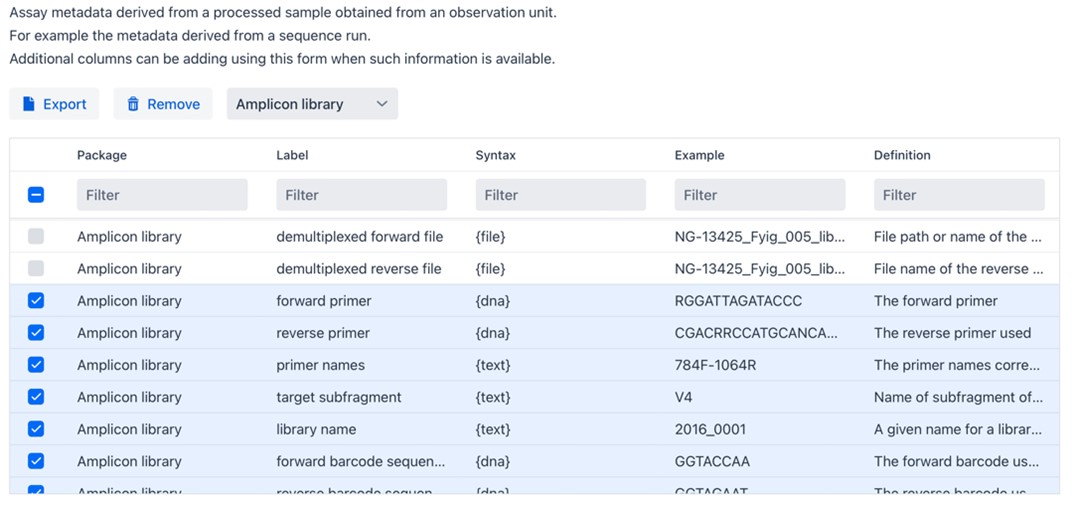
From the publication we learn that that 16S rDNA sequences were obtained from fecal samples. On the FAIR Data Station, unfold Assay Information at the bottom left of the textbox and select “Amplicon demultiplexed”. Again, there are mandatory, recommended, and optional Fields for you to customize.
When finished customizing, you can download the Excel workbook and start filling in your sample metadata.
Hint
You can download a template Excel workbook created by this tutorial available here
Next steps#
After generating the template, metadata is recorded directly in the Excel file. See the Validation page for details on how this data is checked automatically.